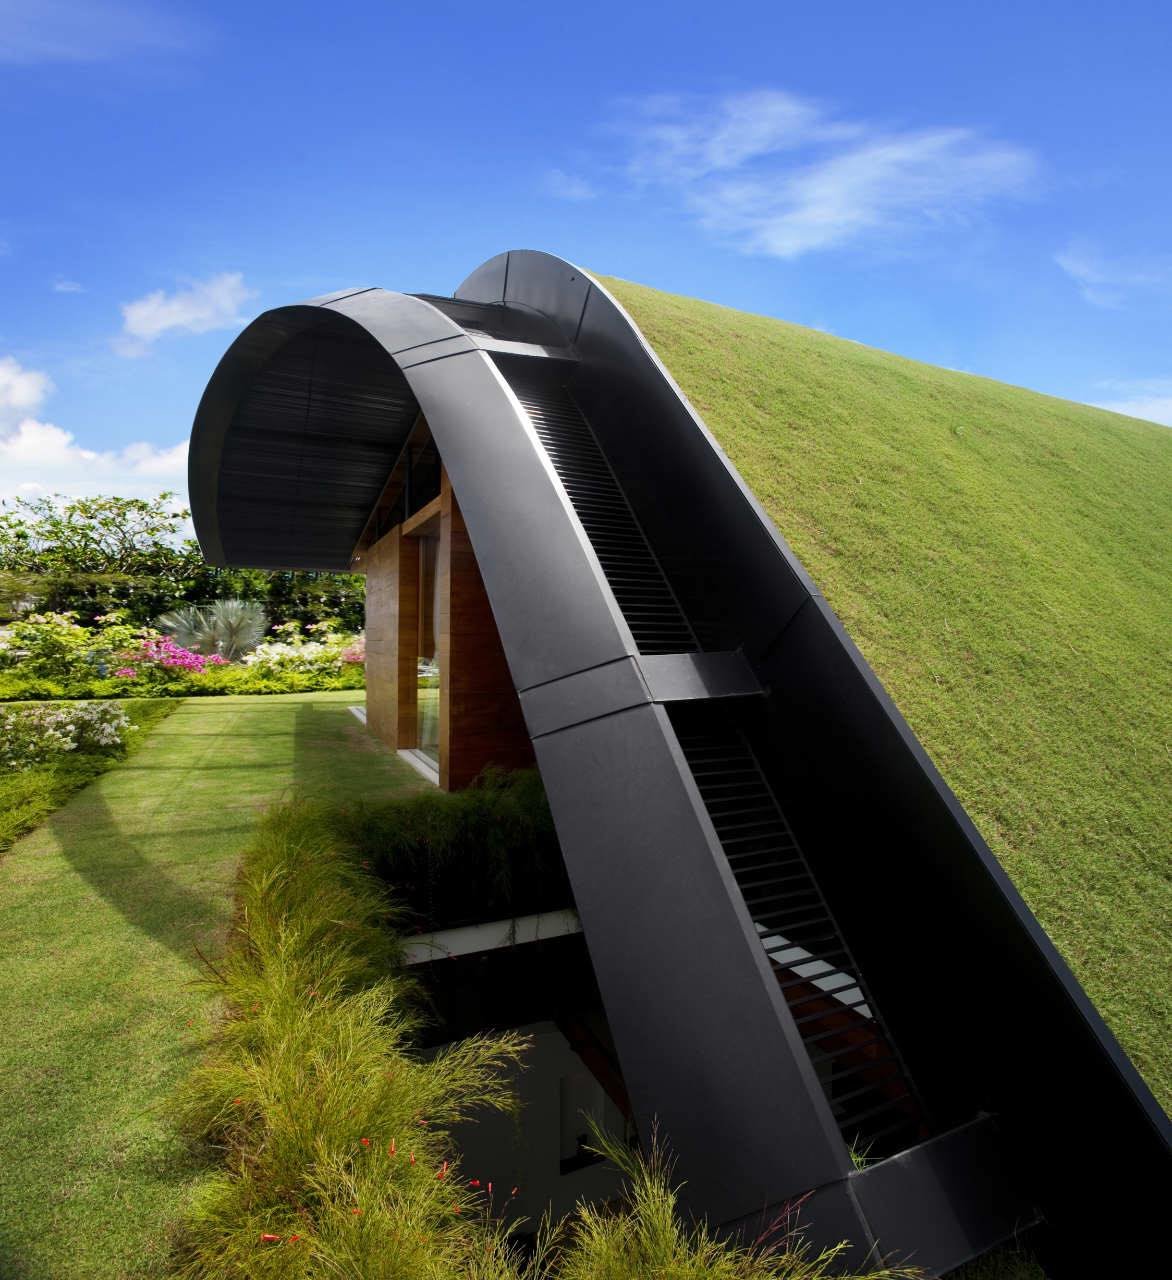
Monday, January 30, 2012

Projects = Scraps = Scrappy Projects !

As our Month long of Scrappy Fun almost comes to a end...

I thought it might be kinda fun to show you a Scrappy Project from the very start to the very finish!

As in the original project, then the scraps from the project, and then the project created from the scraps! {did ya catch all that?}

My friend Sheri made 4 Shelby Mine Purses recently for Christmas. Each one in a totally different colorway.

#1) What I would call Dark Country... It has that country vibe with Sheep, Roosters, Wood- Grain, Apples... And, dark homey colors: Deep Red and Forest Green.
DSC_0881

#2) I would call this Soft and Subdued... It has a bit of the country / cottage vibe in soft and subtle colors: Denim Blues and Saddle Browns.
DSC_0883

#3) This would be the Bright and Cheery one... It has the ever popular Aqua and Red with a bit of Pink too.


#4) I don't have a photo of #4. But it was made with this Charm Pack... Happy Greens and Sunny Yellows in a bit of Country...

It might be a little overwhelming to imagine all the scraps from these 4 projects in one quilt...
DSC_0887v

How bout if we grab all the scraps from these four purses

Press them...
DSC_0891

and sort them by color...
DSC_0892

Sheri's scraps were mostly 1.5" strips left over from the Charm Squares she used in her purses.

DSC_0896

Now when you see them all together it doesn't look too bad.
DSC_0891
But let's break them up a bit just for fun...

I've sorted them into different colorways.... You could come up with some scraptacular projects using just a few colors from this big pile of scraps...

Pink, Green and Brown...


Red, White, and Blue with a bit of Gray...
DSC_0902

This is a pretty combo... Sunny Yellow and Happy Green make that darker country black floral pop!
DSC_0903

But what if I chose just about 5 colors from that big pile of scraps, sewed them together, and then used my funky pinwheel template to make a funky pinwheel block?
Scrappy Funky Pinwheel

I've never made Scrappy Funky Pinwheel's before... And I LOVE them!
Scrappy Funky Pinwheel

And look how well the dark deep turquoise prints from purse #1 blends in with the bright aqua prints from purse #3.
Scrappy Funky Pinwheel

Even the dark reds from Purse #1 sit next to the bright reds from purse's #3 and #4 pretty well.

I used white Kona cotton for the background... And to tie the quilt together I bought the Aqua and Red Dot for the Border.
Scrappy Funky Pinwheel
With just a little sorting, pressing, and sorting again... I was able to put together a bright, happy and fun little baby quilt from 4 completely different colorways/projects! For me... The possibilities are endless with Scraps!

I've done up some Instructions with Photos for the Scrappy Funky Pinwheel Block in PDF format.

If you would like to download the PDF instructions for the scrappy block, you can do so
Photobucket

NOTE:
This Scrappy version is made using my Funky Pinwheel Template set, and 1 1/2" x at least 5" scraps.

You WILL NEED the Funky Pinwheel Template Set and Instructions to make this scrappy version. And to use the Scrappy Instructions...

The templates are NEW and IMPROVED and back in my Etsy Shop!


I am no longer hand cutting them. And they are 1/8" thick now! I'm just thrilled with the way they have turned out and will be adding my other templates and some Square It Up! templates to the shop soon!

TOMORROW I reveal the GRAND PRIZE !!! And your last chance to ENTER to win it! I can't wait for you to see all the goodies we're GIVING AWAY!!!

See You Tomorrow and Happy Scrappy Sewing!
ooxx`jodi

Friday, January 27, 2012

Crumb Quilts and another Give Away !

Today on Pleasant Home, we have our last featured blogger and featured tutorial for our month long Sew Scraps Along!

Today I'm pleased to have Andrea from Knitty Bitties as a guest...


Andrea's featured Tutorial is this Simply Fantastic little project she made with her fabric crumbs!
What are Fabric Crumbs? You ask..... Well Andrea and I just happen to both think - they are your Fabric Scraps that are less than a Charm Square (5" x 5").

The littlest, itsiest, bitsiest Fabric Scraps that you "could" actually sew with.

Here is a little bit of my crumbs....
Fabric Crumbs

And here are the 5"x5" blocks I made using Andrea's Tutorial and my Fabric Crumbs... Tomorrow I'll share my finished project with you.
Crumb Quilt Block

A little birdie told me that not only does Andrea have an awesome tutorial on her blog, she's GIVING AWAY a great little stack of Fabric!!! So hurry on over to take a look at Andrea's Project and enter to win! :)

Happy Scrappy Sewing.... ooxx`jodi

Tuesday, January 24, 2012

Scrappy 60 Degree Quilt Block

Where has this month gone?

When I emailed Kim of Magnolia Bay Quilts fame, it seemed that January 24th was so far away...

Kim has recently posted a few posts on a really great tutorial that she has put together...

The 60-Degree Quilt... Isn't this just scrumptious! The Perfect Scrappy Quilt!
60-Degree Quilt

I am in LOVE with all her bright and happy fabrics...
60-Degree Quilt
I've started a little project using Kim's tutorial, but we had a little incident yesterday that sort of threw a wrench in my sewing and photographing plans for this post. Let's just say one of our vehicles was minding it's own business in a parking lot and no longer has a door!

I'll share my version of Kim's 60 degree Quilt later this week... But did you know....

Kim has written two scrappy books... Scrap Basket Surprises and...
Scrap-Basket Surprises

Scrap Basket Sensations...
Scrap-Basket Sensations
LinkPhoto courtesy of Martingdale Company on Flickr

If you haven't visited Kim at Magnolia Bay Quilts... You really should... Especially today...

Not only is there a great Scrappy Tutorial, but Kim is giving away her book "Scrap Basket Sensations" ! Woot! :) What you waiting for? Head on over and take a look at Kim's tutorial and enter to win her book!

Happy Scrappy Sewing!
ooxx`jodi

Saturday, January 21, 2012

Scrap Republic Give Away !!!

GIVE AWAY HAS ENDED

I think this is going to be one of my all time favorite Scrap Quilt Books!
Love this book!

I was able to review the book this past week and I'm in LOVE...

There are 8 Simply Fantastic Quilt Projects with beautiful photos !

Beautiful Photos

And the book delivers exactly what it Promises!... Projects for those who love COLOR...

I think my most favorite quilt in the book is VOLUME on page 34... Absolutely Scrumptious!
One of my favorites
How would you like to win a copy of Scrap Republic?!?

C&T Publishing is going to send one lucky reader a copy of Scrap Republic! Now how nice is that?!

GIVE AWAY HAS ENDED
Leave a Comment on this post.. Answer the following question(s):

Do you like to sew in the peace and quiet?
Or do you like somethin playin in the background?
Music?
T.V.?
Books on CD?


Most of the time I like peace and quiet. I enjoy sewing in solitude. But there are days when I have one of my Pandora stations or iTunes turned way up! And I even pop a movie in once in a while. My latest favorite? Happy Feet... a little bit movie and a little bit music. Love it.

If you'd like to get your own copy of Scrap Republic... You can buy it...
Photobucket


Friday, January 20, 2012

Scrappy Mug Mat Tutorial

Print Friendly and PDF

I had much fun sewing these little scrappy mug mats!

I decided to call them Mug Mats because they're just a bit smaller than the larger Mug Rugs I usually make...

Square Mug Rugs with Ric Rac

Here's a quick tutorial on how I made them...

SCRAPPY MUG MATS
finished size 6" x 6"

1)
Cut 2"x2" squares of scrap fabrics - you will need 16 squares for each mug mat

2)
Cut a 8" x 8" square of Fusible Grid Interfacing
1
{you can use any kind of fusible interfacing, the grid just helps to keep your squares of fabric aligned. Just make sure you use light weight}

3)
Lay your 2" x 2" pieces of fabric onto the Interfacing (following the grids) until it looks good to you

2

4)
Press your fabrics to the Fusible Interfacing per directions that come with Interfacing

5)
Matching right sides together, refer to photo and finger press along the vertical lines first, sew 1/4" seam. Repeat this for each row.

4

6)
Lay flat onto your cutting mat and trim just a hair off each seam. Press each seam open.

5

7)
Now repeat steps 4-6 for the Horizontal Rows.

6

Press entire pieced "block".

7


8

8)
Cut a piece of backing and batting...

9

9)
Quilt your pieced squares to the batting if desired. Don't sew the Backing on yet.

10)
Cut 4 pieces of Ric Rac (you will need 4 - 6.5" pieces for this mug mat)

11) lay them out on the right side of your pieced squares, as shown in the photo below. Staring at one point and going around. Baste the Ric Rac really close to the edge of the pieced top, all the way around.

10

12)
Now lay your pieced top and backing right sides together and sew around the mug mat, leaving an opening on one side for turning.

13)
Clip Corners, Turn Right Side Out, Press and then Top Stitch close to edge on all four sides, sewing the opening closed as you go.

Scrappy Mug Mat


Original Tutorial for Quick Piecing Tiny Scraps using Interfacing...
Can be found @ Sew Mama Sew by Elizabeth of Oh Fransson!


Square Mug Rugs with Ric Rac

Happy Scrappy Sewing ! ooxx`jodi

Thursday, January 19, 2012

Scrappy Update, Tiger Tape, and another Entry!

My Scraptacular Picnic Quilt from Nanette's tutorial is almost done!

Introducing the top to my 2011 Scrappy Quilt!
Picnic Quilt
{every year I make a quilt with the previous years scraps. I now have a 2008 & 2009 completed and my 2011 is almost finished... my 2010 is still a work in progress.. click on the year to see each quilt}


Picnic Quilt

I need to find a backing {crossing my fingers it can come from my stash}..
Picnic Quilt

And it will be ready to be quilted! I can't wait until it's done. I am totally in love with it.
Picnic Quilt


My next Scrappy Project is the Scrappy Dresden from Lurline's Tutorial. It's finished and enjoying it's new home on my dining room buffet.
Scrappy Dresden Table Topper

I tried a great "new 2 me" product on this project... It's called Tiger Tape...

Great Notion
Have you heard of it? Have you tried it?

The tape is used as a guide for evenly spaced hand quilted stitches.. It's reusable and comes in different sizes for different stitch widths. It's very cool.

So I cut a few small pieces and stuck them along my Dresden points and just followed the lines on the tape. Nearly perfect quilted stitches...
Scrappy Dresden Table Topper

What great results... Don't you think? You can read more about it HERE and if you'd like to purchase some, you can do so HERE.
Scrappy Dresden Table Topper

Beverly of Tiger Tape graciously sent a package along to include in the Grand Prize Give Away at the end of the month! Thanks Beverly!

How bout another entry to the Grand Prize Drawing!?!

Leave a comment on this post... Answer the following question:

Do you have a Favorite Season?

I love all seasons. In fact I LOVE a year that has a bit of everything in it. I have been wishing and wishing for lots and lots of snow this week... But I have to say,,,Summer is my absolute favorite time of year.

I'll be back tomorrow with the Tutorial for the little Scrappy Square Mug Mats! I decided they should be called mats because their smaller than what I usually make for a {mug} rug.. :)

Square Mug Rugs with Ric Rac


Happy Scrappy Sewing! ooxx`jodi
linkin up with Amy

LinkWithin

Blog Widget by LinkWithin
 

Powered by Blogger. Layout Design by Design Chicky (© 2009).